*PLEASE NOTE BEFORE CONTINUING: I HIGHLY RECCOMEND YOU DON'T ATTEMPT THIS TUTORIAL IF YOU DON'T HAVE AN NVIDIA OR AMD GPU WITH ATLEAST 4GB OF VRAM AND A 64-BIT CPU.*
DeepFakeLoser's Guide For Making Deepfakes!
Requirements:
- A video editing software (I use Adobe After Effects but if you're looking for some good freeware I highly recommend VSDC Free Video Editor)
- DeepFaceLab (https://github.com/iperov/DeepFaceLa...windows_app.md - Choose the correct version for your GPU in the Google Drive)
- A video of your celebrity that's between 10 and 20 min long (interviews are good as you have a wide variety of facial expressions)
- A porn video (oo lala) with the pornstar you want to replace the face of (look for videos which are 720p or higher with the adult actor having a similar face shape as the celebrity you are putting on there for the best results)
Step 1: Installation and Setup
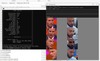
Extract DeepFaceLab in C:\ (or the root of your HDD). It should look like this when you open the folder:
1.jpg
Run "1) clear workspace.bat" to remove the default videos that come with DFL. Your workspace folder should look like this now:
2.JPG
Step 2: Trimming Videos and Tips for Best Result
Open the video of the celebrity you downloaded in your video editing software. I chose to use this video of Chris Pratt:
For shots with other people in I create a new black solid and block them out or just move the video in my editing software so they are out of frame. For parts with no Chris Pratt in I just remove. You just want a video of all the shots of just the celebrity of your choice with no other faces in.
Export this to your workspace folder, making sure it's called data_src(*.mp4/*.avi). The file extension doesn't matter so much so long as it's a video file and file is called data_src. I personally just export to .avi.
My workspace folder now looks like this:
3.JPG
The next step is to edit down your pr0n video to the scenes you want to replace the face on. Now, yet again for the best results you only want to have the face of the porn actor you wish to replace in the shot. You CAN do shots with other faces in, but there will be an extra step later on which is fiddly, I will add this in case you wish to try this. I'm going to trim down this video: https://www.boyfriendtv.com/videos/4...es---reckless/ (I have a suit and tie fetish...eat me)
I'd suggest trimming the video down so it's only about a minute to 2 in length..the longer the video, the longer time needed to train the model (I'm talking LOTS of hours). Call it data_dst(*.mp4/*.avi).
This is how my workspace folder looks now:
4.JPG
Step 3: Extracting Faces
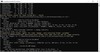
You now want to navigate to the root folder of DeepFaceLab and run "2) extract images from data_src.bat". Since my data_src is about 2min long I'm going to use the default and press enter. If your data_src is longer, say 10min in length, I'd type 4 and press enter (or 8). This is just how many frames to skip before extracting a frame that it will analyse.
It will now ask you what format the frames to be in. I always type JPG and press enter as the file size is smaller. Here is how it looks for me:
5.jpg
![]()
When it is finished press any key to continue. The next step is to detect the faces in the frames we just extracted. Run "4) data_src extract faces S3FD best GPU.bat" to do so. This may take some time, so go grab a coffee or do some housework. You'll know it's finished when it says press any key to continue again.
The next step is to extract the frames from the data_dst video. Do you this run "3.2) extract images from video data_dst FULL_FPS". As this is the video we are replacing the face on it will always be at full fps. Type JPG and press enter again to extract these frames.
Just like before, we now need to detect the faces in the frames extracted from data_dst. Run "5) data_dst extract faces S3FD best GPU.bat". This may also take a little while so like before, go do something for a little while while you wait.
Step 4: Removing "Junk" from workspace folders
The next thing we need to do is to remove any faces that have been detected that look dodgey. We first need to go into workspace/data_src/aligned and delete any faces of the celebrity that have have strange rotation or straight up don't contain the face.
![]()
Next, we need to go into workspace/data_dst/aligned and delete any faces that also have strange rotation. If you also used shots which had more than one face, you need to remove the secondary faces that have been detected. This can be tedious and fiddly but doable.
![]()
Step 5: Training
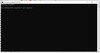
Now, there are a few training models you can use and all create differing quality of results. If you are on a lowspec computer I suggest running "6) train H64.bat". I've always had good results with "6) train SAE.bat" when ran on my own computer. Choose which type of training you wish to do and open it. You'll be presented with this:
![]()
I suggest typing "y" and pressing enter to enable autobackup feature, then for ease of use, just keep pressing enter to use the default values for the rest of the settings.
If all goes well, you should now be presented with something like this:
![]()
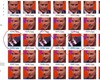
Let it run untill the number counting up reaches between 1000 and press "P" in the little window on the right to produce a preview of what the training model is doing. Should look like this:
![]()
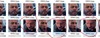
The number counting up in the cmd window is actually the iteration number. You want to run the training model untill this number is between 75,000 and 100,000. Yes, it's slow. Best to do this bit overnight while you sleep! You can check at any time by pressing "P" and if you think the right most faces (which are the merged faces) look good enough quality then you can press enter for it to save and finish training. (You can always open the training again if when you go to convert in the next step it doesn't look clear enough, it saves the progress of wherever you were!)
Step 6: Converting Frames
(it's been 84 years.gif)
Now, you need to pick the .bat which suits your training model. For me, I used SAE so I will choose "7) convert SAE.bat". Run this and you'll be presented with this screen:
![]()
Type "y" and press enter as we'll be using the interactive converter for ease of use.
![]()
Now, this looks scary, but essentially this interactive converter allows you to cycle through frames of the video and adjust specific settings for each frame of the video such as colouring, masking etc.
Press "tab" to show the video. You want to use ">" and "<" to cycle through frames. My workflow here is to find the first frame with a face replaced on it (it might be the first one for you) and I press "3" or "4" depending on what looks best. I then press "/", what this does is applies the settings for the frame you're on to the rest of the frames forward and skips to the next. You can press "tab" at any time to show the keybinds again, play with the settings and get to know them!
When you're finished, simply press "enter" and the converter will convert the rest of the frames and you must close it when it reaches 100%.
To render the video, simply use either "8) converted to avi.bat" for AVI or "8) converted to mp4.bat" for mp4. When prompted, just press enter to use the default bitrate.
You will now have a file in the workspace folder called "result".
![]()
Final Step: Editing Result Video
You may have noticed during the conversion process some frames just didn't look good. This could be for a number of reasons, the quality of the videos used, the dataset not having enough facial expressions (pr0n actors sure like to move their heads around A LOT). It's best at this stage to import the result video back into your video editing software and cut out the parts you don't like. I also like to apply some colour correction here, namely mess with the exposure so the darker pixels are darker.
-------------------------------
My results:
Gif Preview:
![]()
Full Video with Sound:
https://mrdeepfakes.com/video/5738/c...nding-somebody
-------------------------------
Feel free to shoot me any questions, I'm not as knowledgable on tech issues and I may point to the correct place to ask or find your answer to such questions but any steps in this tutorial you don't understand I can answer. :)
DeepFakeLoser's Guide For Making Deepfakes!
Requirements:
- A video editing software (I use Adobe After Effects but if you're looking for some good freeware I highly recommend VSDC Free Video Editor)
- DeepFaceLab (https://github.com/iperov/DeepFaceLa...windows_app.md - Choose the correct version for your GPU in the Google Drive)
- A video of your celebrity that's between 10 and 20 min long (interviews are good as you have a wide variety of facial expressions)
- A porn video (oo lala) with the pornstar you want to replace the face of (look for videos which are 720p or higher with the adult actor having a similar face shape as the celebrity you are putting on there for the best results)
Step 1: Installation and Setup
Extract DeepFaceLab in C:\ (or the root of your HDD). It should look like this when you open the folder:
1.jpg
Run "1) clear workspace.bat" to remove the default videos that come with DFL. Your workspace folder should look like this now:
2.JPG
Step 2: Trimming Videos and Tips for Best Result
Open the video of the celebrity you downloaded in your video editing software. I chose to use this video of Chris Pratt:
For shots with other people in I create a new black solid and block them out or just move the video in my editing software so they are out of frame. For parts with no Chris Pratt in I just remove. You just want a video of all the shots of just the celebrity of your choice with no other faces in.
Export this to your workspace folder, making sure it's called data_src(*.mp4/*.avi). The file extension doesn't matter so much so long as it's a video file and file is called data_src. I personally just export to .avi.
My workspace folder now looks like this:
3.JPG
The next step is to edit down your pr0n video to the scenes you want to replace the face on. Now, yet again for the best results you only want to have the face of the porn actor you wish to replace in the shot. You CAN do shots with other faces in, but there will be an extra step later on which is fiddly, I will add this in case you wish to try this. I'm going to trim down this video: https://www.boyfriendtv.com/videos/4...es---reckless/ (I have a suit and tie fetish...eat me)
I'd suggest trimming the video down so it's only about a minute to 2 in length..the longer the video, the longer time needed to train the model (I'm talking LOTS of hours). Call it data_dst(*.mp4/*.avi).
This is how my workspace folder looks now:
4.JPG
Step 3: Extracting Faces
You now want to navigate to the root folder of DeepFaceLab and run "2) extract images from data_src.bat". Since my data_src is about 2min long I'm going to use the default and press enter. If your data_src is longer, say 10min in length, I'd type 4 and press enter (or 8). This is just how many frames to skip before extracting a frame that it will analyse.
It will now ask you what format the frames to be in. I always type JPG and press enter as the file size is smaller. Here is how it looks for me:
5.jpg
When it is finished press any key to continue. The next step is to detect the faces in the frames we just extracted. Run "4) data_src extract faces S3FD best GPU.bat" to do so. This may take some time, so go grab a coffee or do some housework. You'll know it's finished when it says press any key to continue again.
The next step is to extract the frames from the data_dst video. Do you this run "3.2) extract images from video data_dst FULL_FPS". As this is the video we are replacing the face on it will always be at full fps. Type JPG and press enter again to extract these frames.
Just like before, we now need to detect the faces in the frames extracted from data_dst. Run "5) data_dst extract faces S3FD best GPU.bat". This may also take a little while so like before, go do something for a little while while you wait.
Step 4: Removing "Junk" from workspace folders
The next thing we need to do is to remove any faces that have been detected that look dodgey. We first need to go into workspace/data_src/aligned and delete any faces of the celebrity that have have strange rotation or straight up don't contain the face.
Next, we need to go into workspace/data_dst/aligned and delete any faces that also have strange rotation. If you also used shots which had more than one face, you need to remove the secondary faces that have been detected. This can be tedious and fiddly but doable.
Step 5: Training
Now, there are a few training models you can use and all create differing quality of results. If you are on a lowspec computer I suggest running "6) train H64.bat". I've always had good results with "6) train SAE.bat" when ran on my own computer. Choose which type of training you wish to do and open it. You'll be presented with this:
I suggest typing "y" and pressing enter to enable autobackup feature, then for ease of use, just keep pressing enter to use the default values for the rest of the settings.
If all goes well, you should now be presented with something like this:
Let it run untill the number counting up reaches between 1000 and press "P" in the little window on the right to produce a preview of what the training model is doing. Should look like this:
The number counting up in the cmd window is actually the iteration number. You want to run the training model untill this number is between 75,000 and 100,000. Yes, it's slow. Best to do this bit overnight while you sleep! You can check at any time by pressing "P" and if you think the right most faces (which are the merged faces) look good enough quality then you can press enter for it to save and finish training. (You can always open the training again if when you go to convert in the next step it doesn't look clear enough, it saves the progress of wherever you were!)
Step 6: Converting Frames
(it's been 84 years.gif)
Now, you need to pick the .bat which suits your training model. For me, I used SAE so I will choose "7) convert SAE.bat". Run this and you'll be presented with this screen:
Type "y" and press enter as we'll be using the interactive converter for ease of use.

Now, this looks scary, but essentially this interactive converter allows you to cycle through frames of the video and adjust specific settings for each frame of the video such as colouring, masking etc.
Press "tab" to show the video. You want to use ">" and "<" to cycle through frames. My workflow here is to find the first frame with a face replaced on it (it might be the first one for you) and I press "3" or "4" depending on what looks best. I then press "/", what this does is applies the settings for the frame you're on to the rest of the frames forward and skips to the next. You can press "tab" at any time to show the keybinds again, play with the settings and get to know them!
When you're finished, simply press "enter" and the converter will convert the rest of the frames and you must close it when it reaches 100%.
To render the video, simply use either "8) converted to avi.bat" for AVI or "8) converted to mp4.bat" for mp4. When prompted, just press enter to use the default bitrate.
You will now have a file in the workspace folder called "result".
Final Step: Editing Result Video
You may have noticed during the conversion process some frames just didn't look good. This could be for a number of reasons, the quality of the videos used, the dataset not having enough facial expressions (pr0n actors sure like to move their heads around A LOT). It's best at this stage to import the result video back into your video editing software and cut out the parts you don't like. I also like to apply some colour correction here, namely mess with the exposure so the darker pixels are darker.
-------------------------------
My results:
Gif Preview:
Full Video with Sound:
https://mrdeepfakes.com/video/5738/c...nding-somebody
-------------------------------
Feel free to shoot me any questions, I'm not as knowledgable on tech issues and I may point to the correct place to ask or find your answer to such questions but any steps in this tutorial you don't understand I can answer. :)